
02.15.2011

Recently my prized Sony radio stopped turning on. I had bought it about a year ago from a seller that said he had bought it new in the early 1970′s, and I had since really fallen in love with it. It was one of the first “boombox style” portable radios on the market, so it was pretty high-end at the time. I would always show it off to people who visited, regardless of how much they didn’t give a damn, so having it out of commission really bummed me out. I knew that just the power switch had broken, so I figured that I could crack it open and try and figure out what was wrong, and maybe even resurrect it.
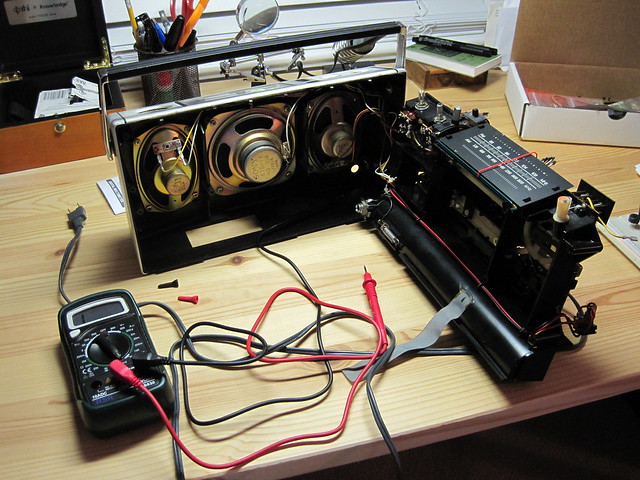
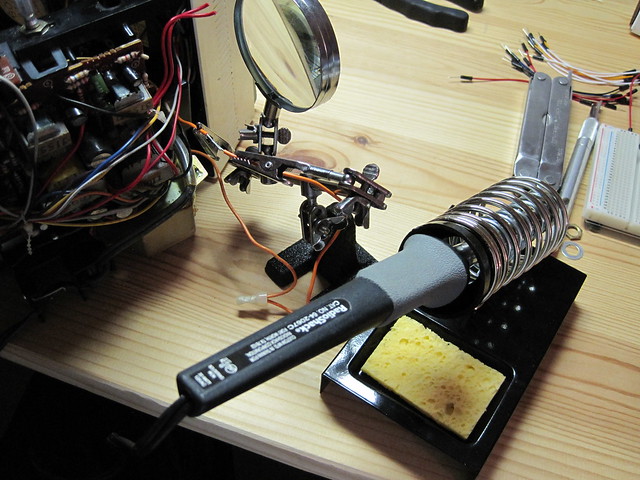
Once I had disassembled the radio the best I could, I saw that the power switch and volume knob were a stacked combination of two audio potentiometers (to control each channel’s volume) and a clicky switch on the bottom that switched the power on and off when the knob was turned all the way to the left. You can see the knob on the left of the radio in the first picture. The clicky power switch on the bottom of the stack was what had broken, it no longer clicked.
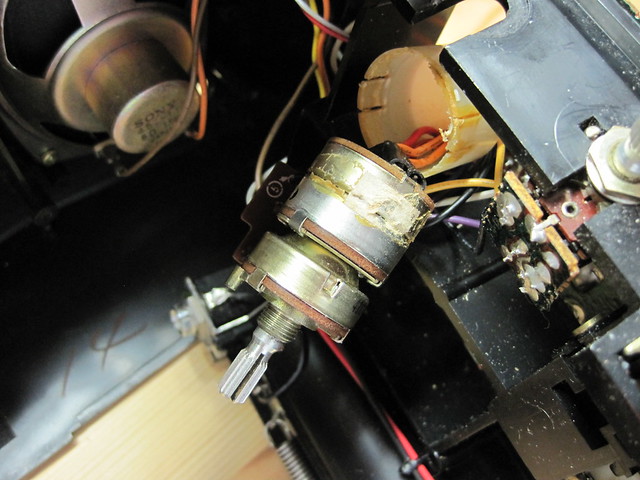
There really wasn’t a way to repair the switch, and finding a similar part would be tough since I would have to replace the whole stack of dual potentiometers and switch, which was really specific. I decided to go the cheap route and just remove the power switch from the circuit, and just always have the radio always be powered on. I figured that I could just unplug the radio when I wanted it off, which is such a janky method that it would be sort of endearing. Everyone loves cobbled together old stuff.
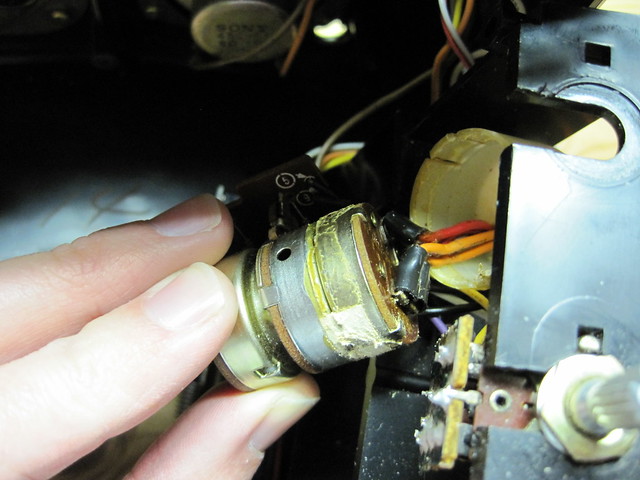
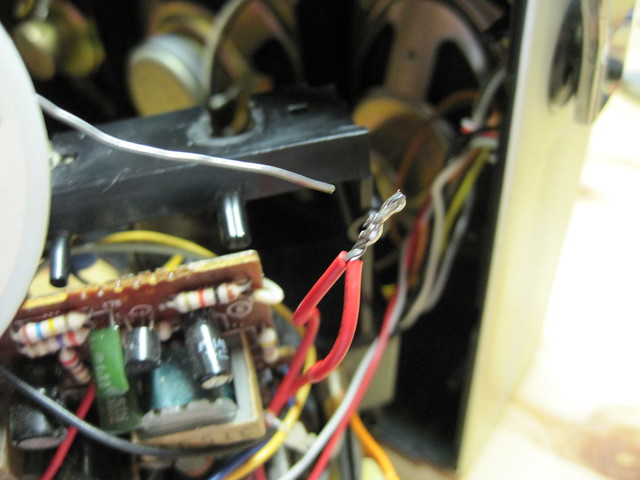
I sliced off the red set and orange set of wires from the switch with one squeeze and then went to work soldering them together permanently. I didn’t actually know why there were two sets of wires in the switch but assumed one was for outlet power and one was for battery power. Regardless I figured what harm could there be in connecting two matching color wires, fate wouldn’t allow something bad to happen.
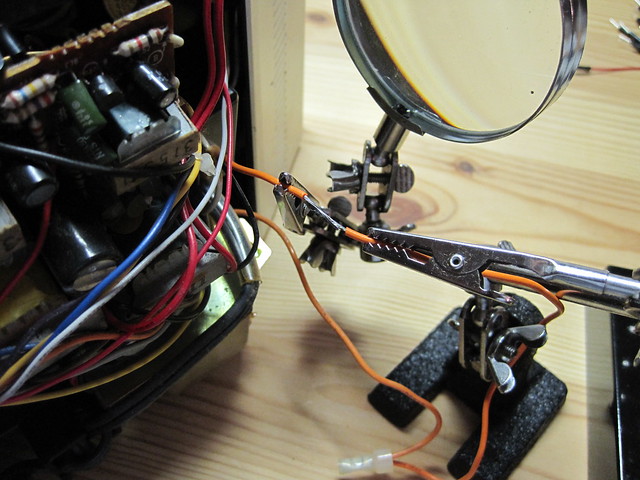
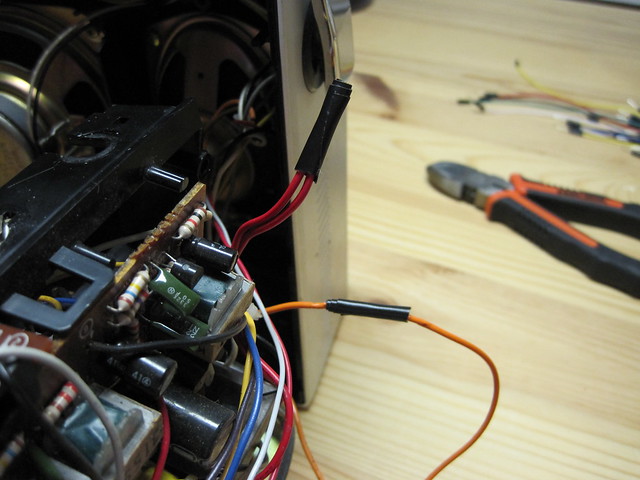
With the wires connected and bypassing the broken switch, I tested it out by plugging it in. I had thought about bringing the fire extinguisher upstairs before I tested it, but was riding the high of possibly having my radio back, so I just went with it. As expected, it started right up and I immediately ran through some stations. I was pretty giddy.
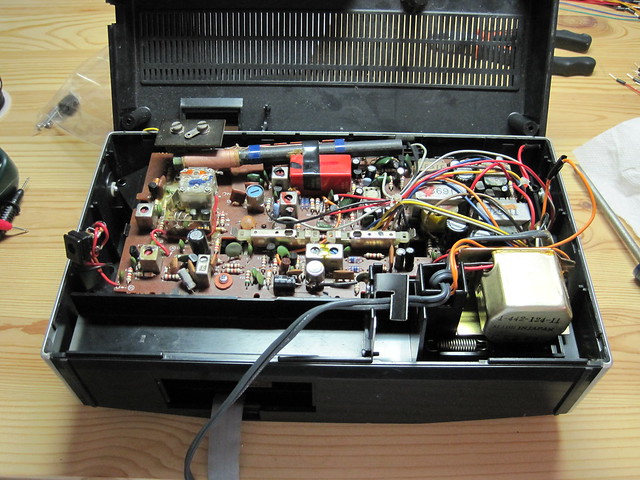
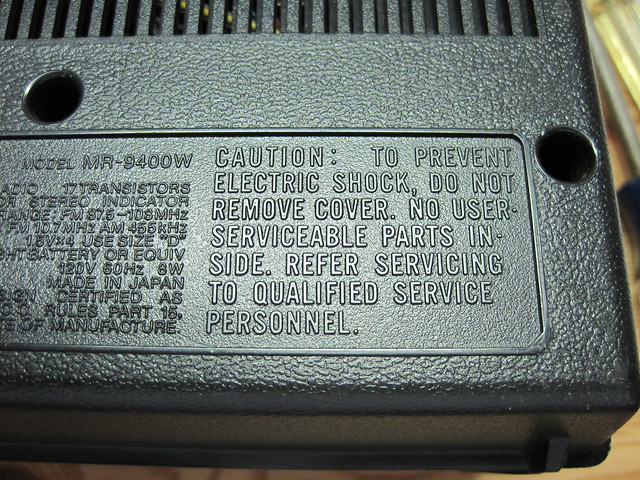
All that was left to do was to reassemble the radio and maybe clean it a little in the process, but I ended up not wanting to mess with it’s consumer electronics patina, plus I was feeling lazy. While wrapping up the assembly I noticed this warning on the back panel. I think they just put those on there so you feel even better when you fix it and don’t die.
After it was all back together I took a quick video of it in action, partially so others could experience that 1970′s sound, and partially because I like taking videos and putting them on vimeo. Guess who was on.
All and all I am pretty pleased with the results. This wasn’t the most thorough fix since now there is no way to turn the radio off, but I also didn’t spend any money or electrocute myself, so I’ll take that win. I also sort of like the character this adds to the radio as I think it gives it that rough and tumble appeal, which I think perfect for a device that is now over 40 years old.
BONUS CONTENT:
I was so enthralled with my newly working radio that I took ungodly amounts of pictures of it, it’s box, and it’s printed materials. Check them out if you want to see more of this thing or some 1970′s warranty cards. I liked that the original price tag was included when I bought it.
Gobs of pictures of radio and box on Flickr
Scans of all the radio’s documents on Flickr
